Creating Your First Full-Stack dApp with Solidity, Hardhat, and React
Part 1: Initial Setup

I was recently tasked with creating a full stack application for a programming course that I’m taking, developed with a React frontend and a SQL database for the backend. One of the requirements for the project was to also include a new technology that I’ve never used before. I immediately knew that I wanted to explore blockchain & smart contract technology, but I also wasn’t sure if that’d be something feasible to learn and implement within the three week span of the project. By some miracle, I was able to successfully write my first smart contract, deploy it to a local hardhat network (more on this shortly), and actually build out a functioning dApp (decentralized application). Now that I’m more familiar with the process, I wanted to write about my experience and help others quickly get set up with a dApp project using Vite for React, especially since finding resources about this was a bit more difficult than I anticipated.
A note on documentation:
The documentation for Solidity and Hardhat are great starting points, especially hardhat’s beginner-friendly tutorial and boilerplate (see resources at the bottom of this post). There were a few things I’d wished were included, which I’m going to detail here as well, in the hopes that things are a bit more clear and helpful to you!
Requirements to get started:
Vite ↗ - Below, we’ll be scaffolding our project with Vite to create out React application, or frontend.
Hardhat ↗ - An ethereum development environment that will enable you to run a test version / local blockchain, deploy your smart contract to that local blockchain, and receive a ton of ethereum test accounts with fake ether for testing transactions on the network.
Solidity ↗ - The programming language that you’ll use to write your smart contract. I won’t be covering the foundations of the Solidity programming language here, so it’s recommended that you take the time to read through the docs on your own.
Metamask ↗ - A simple wallet you can install for Chrome, enabling you to send and sign transactions on the ethereum network.
For the purposes of Part 1 of this series, in this post we’ll cover the following:
Setting up your React app with Vite
Installing Hardhat & Making Some Configurations
Configuring Metamask to Work with our Local Network
Initializing your React Frontend with Vite
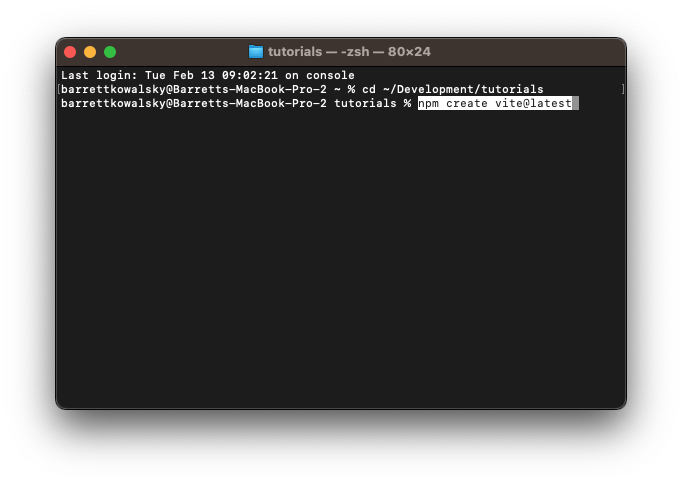
Setting up a React frontend with Vite is super simple, and the Vite documentation makes this a breeze. To install via your terminal, just make sure that you have Node installed on your computer, and then cd into the directory where you want to create your project (for me, that’s a folder called “tutorials”). Then, run npm create vite@latest .
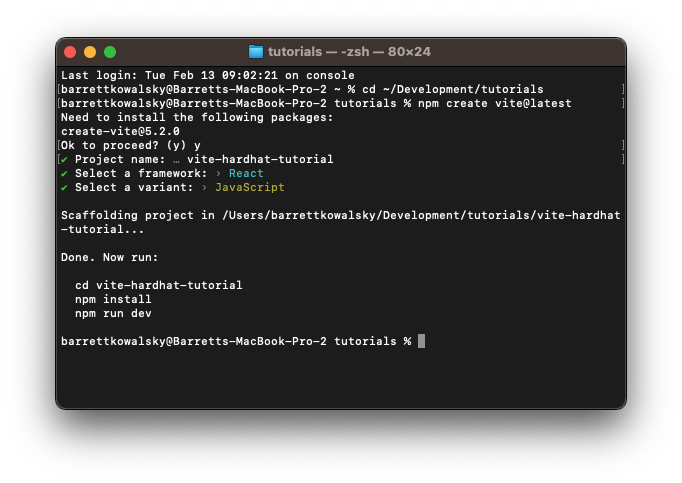
When you run this command, you’ll get a few options. For the purposes of this project, I’m going to be creating a JavaScript React project. Here are the prompts I selected for this overview:
Follow the instructions above – cd into your new directory, run npm install and npm run dev . This should get your frontend running on localhost:3000, and you can verify that everything has been initialized properly.
Let’s close that server down by hitting CTRL+C (on a mac).
While we’re here, let’s also install the ethers.js library. We’ll come back to this later on, but this is going install ethers, which will eventually let us interact with the smart contract from our frontend react code. (Note: there’s another library, web3.js, that you can use instead. Check that out if you’re interested, but for the purposes of this tutorial, we’ll be using ethers.js).
To get that installed, make sure you’re still in the root directory and type npm install ethers . We’ll come back to this in Part 2 of the tutorial later on, but it’s best to get that installed now.
Installing Hardhat & Config
Now onto the fun stuff. We want to install hardhat into the new directory that we just created using Vite. The end goal is to create a frontend that will be able to interact with a smart contract we’ll develop. That smart contract will be deployed through hardhat on a test network, so that we can simulate some transactions on a local ethereum blockchain. One important thing to note is that both Solidity and Hardhat are constantly making updates and releasing new versions - so if the instructions below begin to look different than what you’re seeing in the future, definitely check out the resources linked at the bottom of this article and follow any new instructions as needed.
To get started, and to have a better visual of what’s happening with our file structure, let’s first open up the directory we just created in VSCode, and open up a terminal there. Now in our root directory (for me, that’s vite-hardhat-tutorial), we’re going to begin the process of installing hardhat.
To do that, in the terminal we’re going to run: npm install --save-dev hardhat (note that we don’t need to run npm init here as we already have a package.json file from when we installed Vite).
Now that we’ve installed hardhat, we’ll also run: npx hardhat init
You’re going to be prompted with a few options, as shown in the screenshot below:
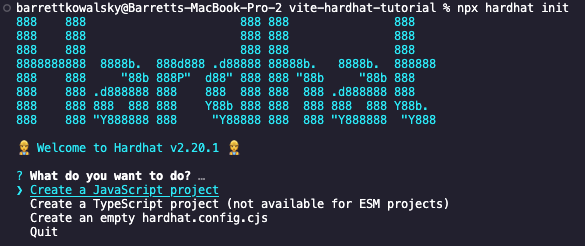
For the purposes of this tutorial, we’re going to select “Create a JavaScript project”, but if you have a solid foundation of using hardhat already, you can simply select “Create an empty hardhat.config.cjs” file.
Selecting “Create a JavaScript project” will do a few things:
It’s going to run a simple project creation wizard that’s going to ask us a few questions
It’s also going to create the following directories in our root dir:
contracts - where the solidity smart contract files will live
scripts - for automation scripts (specifically here we’ll be working with a deploy.js file)
test - where your test files will live
A hardhat.config.js file is generated with some basic configurations, which we’re going to tweak in just a moment.
Necessary dependencies will be installed.
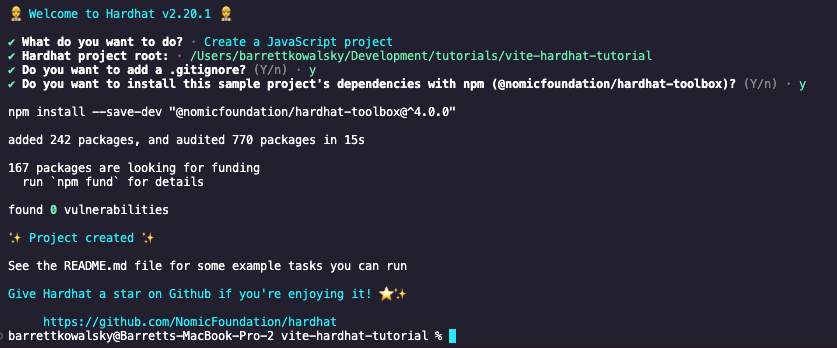
Let’s first run through the responses to the prompts:
? Hardhat project root: <make sure you're selecting the root directory - this should already be selected for you>
? Do you want to add a .gitignore (Y/n) > y
? Do you want to install this sample projects dependencies with npm (@nomicfoundation/hardhat-toolbox)? (Y/n) › y
Sweet! Now that we’ve set that up, we should see some success messaging like so:
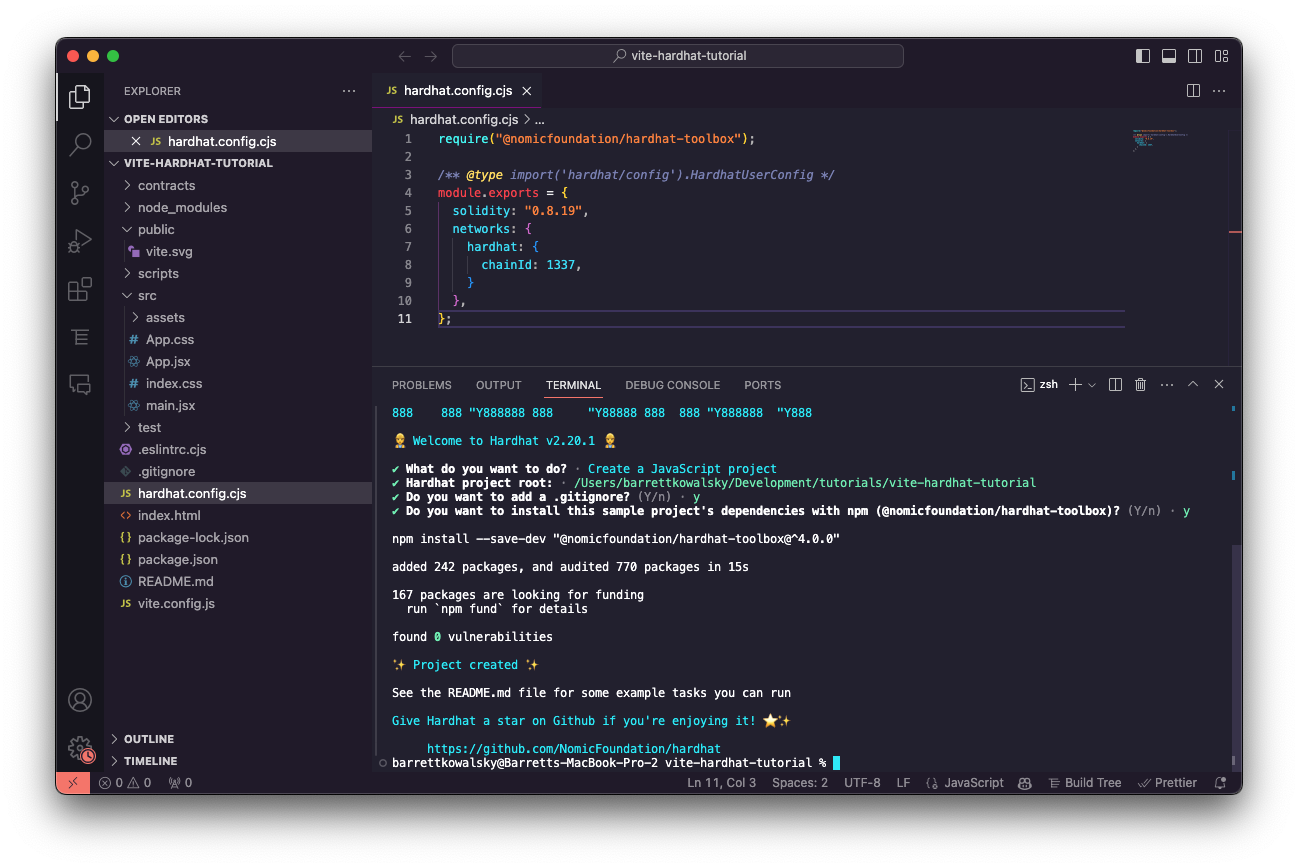
Before we move onto configuring Metamask, we’re going to make one small update to the hardhat.config.js file. Open that, and update the module.exports to the following (and adjust Solidity version as needed for your project):
module.exports = {
  solidity: "0.8.19",
  networks: {
    hardhat: {
      chainId: 1337,
    }
  },
};
Configuring Metamask
Metamask is one of many crypto wallets you can use and install onto your browser. At the time of writing, it’s decently popular and can be easily configured for our project. You can find a detailed rundown of how to install and setup Metamask for your browser here.
I’m going to assume that you’ve correctly installed Metamask onto your browser (for this tutorial, we’re using Chrome). Now we need to add test networks so that later on, we’ll be able to interact with our smart contract on the local test blockchain that we’re running.
To begin, click on the Metamask extension, and click on the dropdown arrow to the left of your account name (this is the networks selector dropdown). Make sure that the “Test Networks” toggle is switched to the ON position. Once it is, select “Add Network”. This will open up a new tab for configuring network settings.
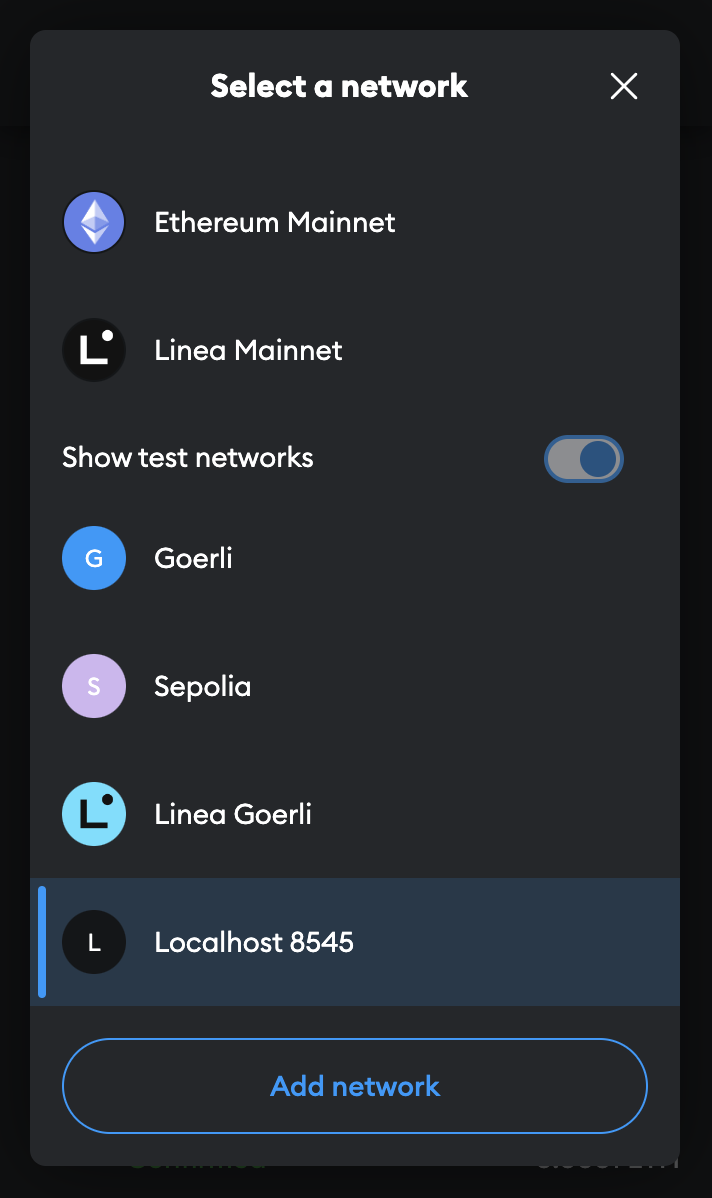
At the bottom of this screen, select the “Add a network manually” link. Then, enter the following details for the required fields and click “Save”.
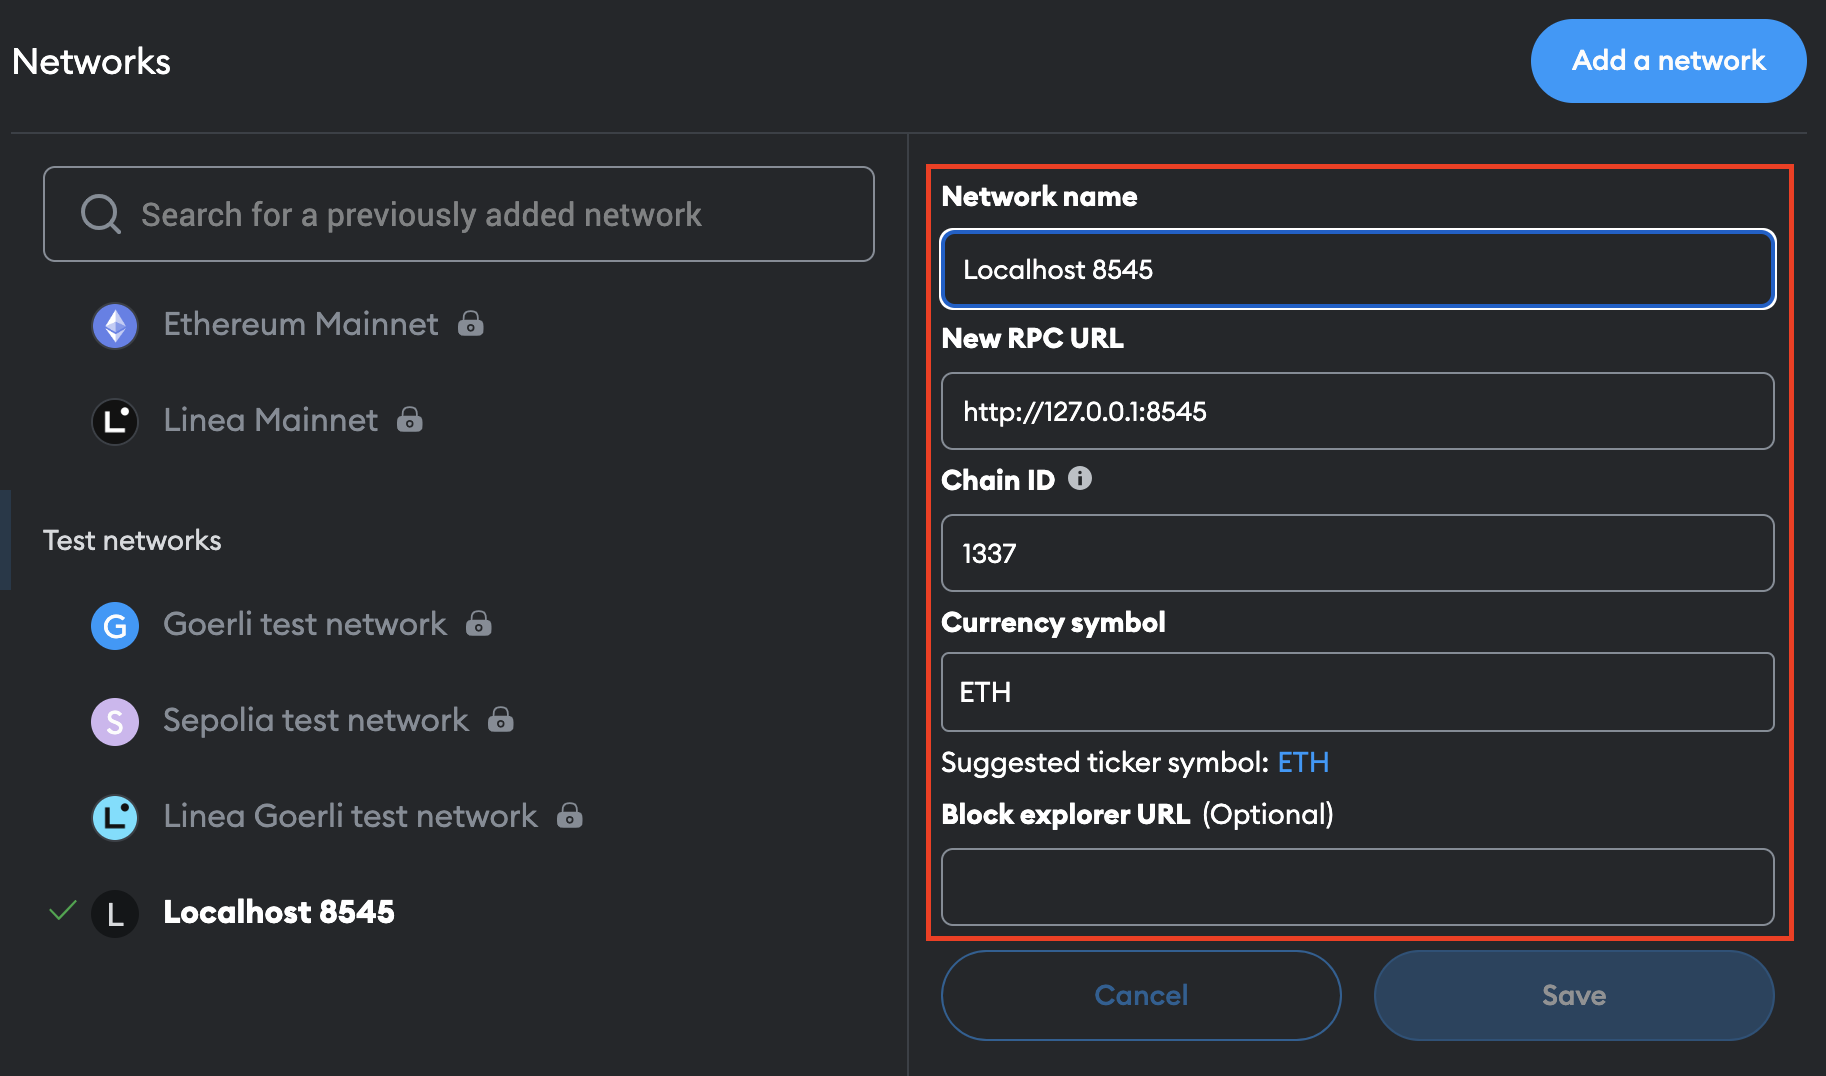
Network Name: Localhost 8545
New RPC URL: http://127.0.0.1:8545
Chain ID: 1337
Currency symbol: ETH
And that’s it! We now have all the basic configurations in place to begin creating our dApp! In part 2, we’ll dive deeper into writing our first smart contract, creating a deploy.js file, and getting our network up and running!
Resources


